
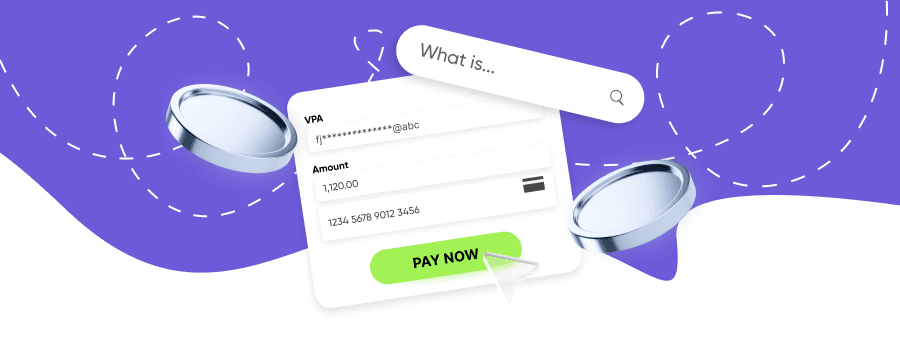
For those who want seamless transactions, knowing what a VPA is in GPay can make a real difference. The term stands for Virtual Payment Address – a unique and simple identifier for unified payments. Using VPA with Paykassma means you don’t need to share detailed bank information during transactions.
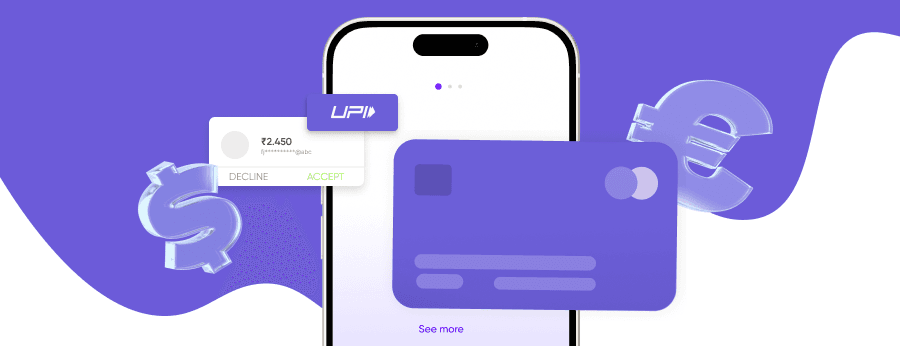
Developed by the National Payments Corporation of India (NPCI), the Unified Payment Interface (UPI) enables instant, secure money transfers between banks and digital wallets via mobile devices. Within UPI, the VPA in GPay simplifies transactions and enhances privacy for users.
Did you know?
Unlike general Virtual Payment Addresses, this guide focuses specifically on how VPAs function in the Google Pay (India) ecosystem – including setup, management, and troubleshooting. Note that the version of Google Pay described here is specific to India; the international versions of Google Pay do not support UPI or VPAs.
What Is a Virtual Payment Address (VPA) in Google Pay and UPI
A Virtual Payment Address acts as a secure alias for your bank details, allowing you to send and receive money without sharing sensitive information like your bank account number. Learning what is VPA and how it works helps protect your transactions while making them faster and easier. The term UPI ID or VPA is often used interchangeably in digital banking and within any UPI-enabled payment app like Google Pay.
Key features of a VPA:
- Serves as a secure and simple identifier in Google Pay.
- Simplifies UPI payments.
- Provides a unique VPA and digital ID independent of your bank account number.
- Allows users to create easy-to-remember IDs.
- Eliminates the need to use details like bank account number or IFSC codes.
- Can link to a bank account or eWallet (but not to crypto wallets).
Examples of VPA Suffixes
A typical VPA looks like name@upi, mobilenumber@bankname, or customid@okbank. For example, a Virtual Payment Address (VPA) may look like username@okicici or 9876543210@upi. It can include letters, numbers, and limited special characters like periods or underscores, depending on the bank’s policy.
Because cryptocurrencies rely on blockchain keys, VPAs are only designed for UPI-based transfers – mainly in India.
Professional Merchant VPA for Scale
Role of a VPA in Google Pay and Unified Payment Interface (UPI)
VPA integration in GPay enables easy, secure daily transactions via UPI. With the Paykassma payment gateway, users can connect their accounts to multiple supported payment methods.
How to Create or Edit an Existing VPA or UPI ID in Google Pay
Install Google Pay
Download it from the Google Play Store or App Store – it’s a UPI-enabled payment app.
Sign in
Open the app, tap your profile picture, and then go to the “Bank accounts” section.
Add your bank
Select “Add bank account.” GPay will automatically detect the banks linked to your registered mobile number.
Choose your bank
Select your bank from the list and confirm the link using the verification password or OTP.
Set up your address
Create your UPI ID (e.g., name@upi) and set a secure four-digit or six-digit UPI PIN to authorize transactions.
Note: In Google Pay (India), a VPA is automatically created when you add a bank account. You can later customize or add more VPAs if your bank supports it – for instance, create a new VPA of your choice.
You can associate one VPA with several bank accounts, depending on your bank and UPI app configuration.
Benefits of Using VPA for UPI Payments in Google Pay
Enhanced Security
Keeps your account and IFSC details private. It eliminates the need to share sensitive information like your bank account number during transactions.
Simplified Transactions
VPA removes the friction of entering long account details for every UPI transfer, making the payment process much faster and more user-friendly.
Real-time Transfers
Full support for instant UPI transactions, ensuring that money is sent and received in seconds, regardless of the time or day.
Multi-bank Flexibility
Allows you to link multiple bank accounts to a single VPA (depending on your bank), providing a unified way to manage your finances.
Bill Payments
Seamlessly supports UPI-enabled online payments for utilities, subscriptions, and other recurring monthly services directly through your VPA.
How to Find or Get Your VPA (UPI ID) in Google Pay
Open Google Pay
Open the Google Pay app (a popular UPI application) on your phone or tablet to start.
Log In
Log in to your account using your secure credentials or biometric authentication.
Access Payment Methods
Navigate to the “Payment methods” section and then select “Bank accounts.”
Select Account
Choose the specific bank account for which you want to find the address.
View VPA/UPI ID
You will see your VPA, often referred to as your UPI ID (e.g., name@upi), listed under the account details.
How to Edit VPA in Google Pay
Your VPA can be edited in the Bank Accounts section. After logging in:
Select Account
Choose the specific bank account you wish to modify from your list of linked accounts.
Initiate Edit
Tap the pencil icon or the "+" button to start editing your Virtual Payment Address (VPA).
Choose New ID
Select and enter a new ID based on your name, phone number, or email address as per your preference.
You can modify your VPA through the app interface; additional changes may require bank assistance.
Troubleshooting Common VPA and UPI Transaction Issues
Not recognized
Double-check if the code is entered correctly. If the issue persists, try again after a few moments or contact your bank for assistance.
Failures
Transaction failures can often result from temporary UPI system outages or an inactive status of your linked bank account.
Multiple VPAs
If you have several identifiers, always ensure you are selecting and using the correct VPA for each specific bank account to avoid routing errors.
Note: UPI and VPA functions are primarily available in India, and may not appear in Google Pay versions used outside India.
Security and Best Practices for UPI and VPA Payments
A Virtual Payment Address in GPay is generally secure when used responsibly. Follow these safety tips:
- Don’t share your VPA on public platforms or social media.
- Enable two-factor authentication (2FA) for added protection.
- Beware of phishing – banks and apps never request your VPA via calls, emails, or SMS.
- Regularly monitor your account for unauthorized activity.
Conclusion: Why VPA in Google Pay Matters
Understanding how VPA in UPI works in Google Pay enhances your financial security and convenience. It simplifies transfers, protects personal data, and supports UPI transactions across multiple bank accounts.
However, remember that UPI and VPA features are currently available mainly in India. Always follow best practices to safeguard your account.
Simplify your customer journey with seamless UPI integration
Online Payment Company #1
Online payment solutions for all types of businesses since 2019